 2 tablespoons grapeseed oil 1/2 medium onion, finely chopped 1 rib of celery, finely chopped 1/4 cup finely chopped bell pepper 2 garlic cloves, minced 1 1/2 cups stock 3 15-ounce cans black beans 2 with liquid 1 drained 1/2 teaspoon ground cumin (I LOVE cumin!) 2 teaspoons lemon juice 4 teaspoons cornstarch | 1. Saute onion, celery, pepper and garlic in the oil in a large saucepan over medium heat for 5 minutes. Don't let the veggies brown. 2. Add stock, 1 can of beans and cumin. Bring soup to a boil then reduce heat and simmer for 10 minutes. 3. Puree the soup using an immersion blender or by pouring into a blender in batches. Be very careful not to fill the blender too full and use a hand towel to hold the lid down on the top of the blender so that the hot liquid does not spray out. 4. Add the remaining can of beans with juice and drained can to the soup along with the lemon juice. Combine the cornstarch with 2 tablespoons of water in a small bowl, then add this slurry to the soup and bring it back up to a simmer and cook until thick. The beauty of this soup is you can use any kind of stock you like and make some great combos with this base recipe. Try pork stock with crumbled bacon or stay all veggie with vegetable stock and add some heat by substituting a hot pepper for the bell, experiment and have fun it will be fantastic! |

Thursday, August 18, 2011
Soups On!
Monday, April 18, 2011
My Crochet Journey
As a kid I always loved to watch my mother crochet, she was lightning fast with that hook and I was always baffled how she knew what she was doing. I asked her to show me once, but me being a lefty just made it too hard for her to teach me.
About four years ago I was walking through a craft store and saw the box of Doodle Looms and I was a kid again seeing the commercial for the first time and wanting them so badly. I grabbed the box and some yarn and went home to make my first afghan. I tried so hard to motivate myself to keep making these little doodle things, but it was no where near as fun as the commercial made it out to be! this was all I managed to do...

Flash forward to two years ago and I saw the Knifty Knitters looms and thought I would try my hand at those, I bought every size they made and more yarn thinking If one was large enough I might make an afghan. I managed some nice hats and scarves, but no way was I going to get anywhere on that afghan I wanted with them.
Last year I thought I had my answer with a knitting machine...WRONG! so, here I was last month looking through completed projects and saw a beautiful rainbow throw by Babukatotium and I decided I was going to learn to crochet even if it killed me. I started watching lessons on youtube and not even realizing it I was crocheting right handed and it was working. If your still reading my long winded story there is a happy ending...
I have completed an afghan!


About four years ago I was walking through a craft store and saw the box of Doodle Looms and I was a kid again seeing the commercial for the first time and wanting them so badly. I grabbed the box and some yarn and went home to make my first afghan. I tried so hard to motivate myself to keep making these little doodle things, but it was no where near as fun as the commercial made it out to be! this was all I managed to do...

Flash forward to two years ago and I saw the Knifty Knitters looms and thought I would try my hand at those, I bought every size they made and more yarn thinking If one was large enough I might make an afghan. I managed some nice hats and scarves, but no way was I going to get anywhere on that afghan I wanted with them.
Last year I thought I had my answer with a knitting machine...WRONG!
so, here I was last month looking through completed projects and saw a beautiful rainbow throw by Babukatotium and I decided I was going to learn to crochet even if it killed me. I started watching lessons on youtube and not even realizing it I was crocheting right handed and it was working. If your still reading my long winded story there is a happy ending...I have completed an afghan!


Friday, March 4, 2011
Caramelized Onion Dip
Today's offering is one of my favorite dips...onion dip!
It goes with so many snack options and people will always ask for the recipe.
I don't measure this one so I am going to do my best to give you roughly what I use.
 Dice 2 cups of white onions and saute in 2 T olive oil over med high heat. Sprinkle with a few good pinches of sea salt and 3 pinches of brown sugar. continue to saute until it looks nice and caramelized stirring frequently so not to burn them.
 Let them cool on a towel to absorb some of the oil. Mix 1 1/2 cups of sour cream and mayo together in a good sized mixing bowl and add the cooled onions.
 Next add some garlic salt, vegetable blend, and dried onion My guess is a teaspoon of each.
 Lastly add a teaspoon of Kitchen Bouquet to give it that signature soup mix color.
 Be sure to make it at least 4 hours in advance so the flavors blend well, overnight is best though.
I am serving this tonight with some beer bread I made from a hearty stout.
 Recipe to come!
It goes with so many snack options and people will always ask for the recipe.
I don't measure this one so I am going to do my best to give you roughly what I use.


I am serving this tonight with some beer bread I made from a hearty stout.

Tuesday, February 22, 2011
My New Favorite Turkey Recipe
I know it's February, but I love big turkey dinners with all the trimmings. We always buy 2-3 extras when they go on sale for Thanksgiving so I can have my fix. This time I tried a Cuban inspired seasoning mix and WOW is all I can say. This has orange and lemon and lots of garlic. I strayed from the original recipe as per usual so I will only give mine.
1 cup of orange juice
1 cup of lemon juice
4 tablespoons chopped garlic
1 tablespoon dried oregano
1 tablespoon ground cumin
1 tablespoon black pepper
whisk all the ingredients together and there is your marinade. place turkey in it overnight breast side down in the fridge. I know many of you don't like the turkey bags, but I have to use them for the simple fact that the turkeys they put on sale around Thanksgiving are rather dry otherwise and I don't have the energy to baste it as often as I should, so you decide bag or baste. I use the bag as directed for time and also used the flour in the bag as directed but I didn't cook it breast side up as stated just to keep that breast soaking in the yummy marinade. My last step before sealing the bag was to put the lemon and orange slices in the turkey cavity.
I didn't have my camera ready, but everyone knows what a turkey looks like cooked =)
Wednesday, February 2, 2011
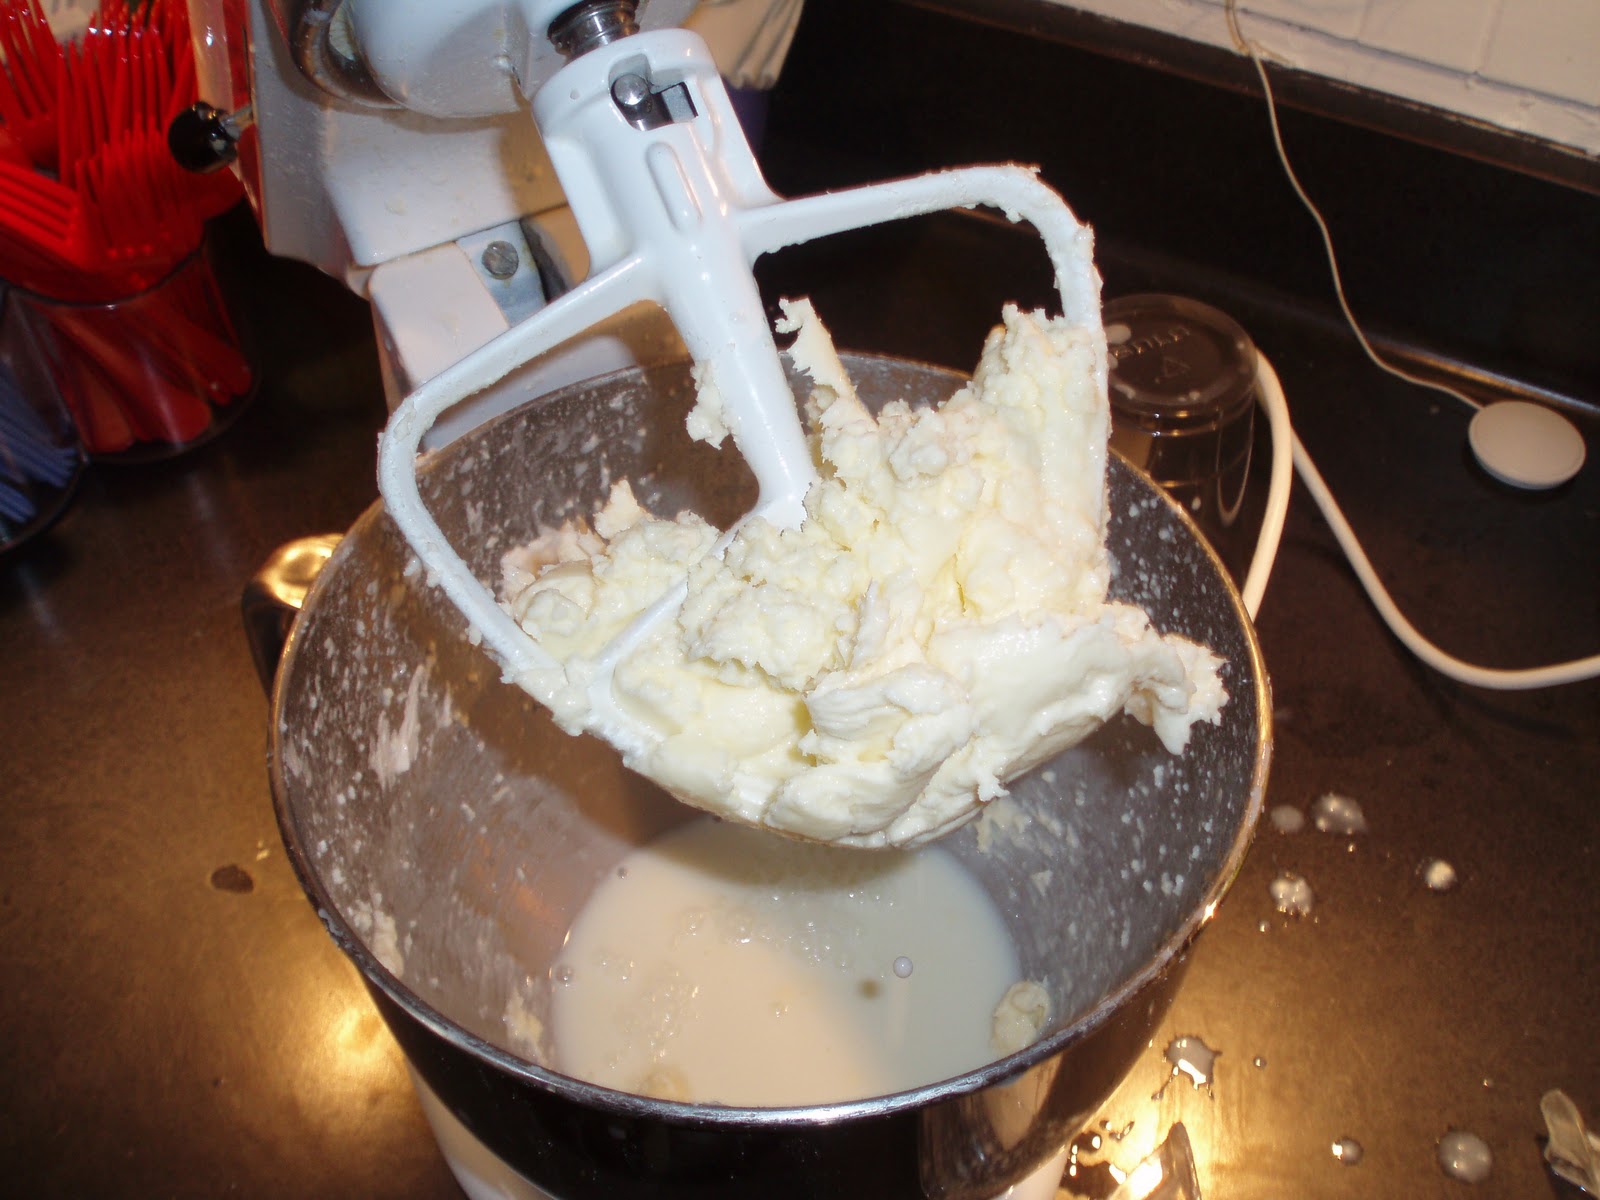
Butter for Imbolc
Today's is Imbolc, the midway point between winter solstice and spring equinox. It goes by many names, but the sentiment is almost always the same: purity, growth and renewal. The end of the darkness of winter and the approaching renewal of life to the Earth. A great day to get started on the spring cleaning, make a donation box, spark some new love or invigorate an old one.
I decided to make butter this year
1. because it is a bit of a messy project and I will have to give my counters a good cleaning anyway.
2. Dairy is a big part of the Sabbat.
3. Who doesn't love butter!
You will need:
Heavy Cream or Manufacturers Cream
Stand Mixer with Whisk and Paddle attachments and the splatter guard
Ice Water
Make sure to clean off your counter of anything you don't want splattered in buttermilk.
Pour 2 cups heavy cream into mixer with whisk attachment and cover in place and turn mixer to high. you will see it start to make whipped cream then it will start to look chunky. Stop mixer and scrape sides.

turn back on and mix on high again until the buttermilk starts to splatter the guard and the butter sticks to the whisk
 Pour off the buttermilk and save it for biscuits, pancakes, or Texas sheet cake (That's my plan for it)
Switch to the paddle and add some of the ice water. make sure not to add ice though. Mix the butter and ice water to wash the residual buttermilk out. Dump the water and add more.
 After washing the butter 3-4 times you will see the water is much less cloudy and all you have left is yummy butter.
 pack this in an airtight container in the fridge if you have any left from all the taste testing you will be doing.
 I made two batches today. I hope it's enough!
I decided to make butter this year
1. because it is a bit of a messy project and I will have to give my counters a good cleaning anyway.
2. Dairy is a big part of the Sabbat.
3. Who doesn't love butter!
You will need:
Heavy Cream or Manufacturers Cream
Stand Mixer with Whisk and Paddle attachments and the splatter guard
Ice Water
Make sure to clean off your counter of anything you don't want splattered in buttermilk.
Pour 2 cups heavy cream into mixer with whisk attachment and cover in place and turn mixer to high. you will see it start to make whipped cream then it will start to look chunky. Stop mixer and scrape sides.

turn back on and mix on high again until the buttermilk starts to splatter the guard and the butter sticks to the whisk

Switch to the paddle and add some of the ice water. make sure not to add ice though. Mix the butter and ice water to wash the residual buttermilk out. Dump the water and add more.


Friday, January 28, 2011
Shortbread Lemon Bars
As promised yesterday a use for that lemon zest! These are my favorite lemon bars because of the thick shortbread cookie like crust. They have a great zing from the zest and are quite simple to make.
Ingredients
2 1/4 cups all-purpose flour1/2 cup confectioners' sugar
1 cup butter, softened
6 eggs
2 1/4 cups white sugar
3/4 cup lemon juice
zest of one lemon
Powdered sugar for dusting
Mix 2 cups of flour and confectioner's sugar together. Cut in the butter or margarine. Mix well until the dough resembles pie dough consistency. Press the dough into a 9x13 inch baking pan.
Bake 15 minutes.
Beat together eggs, sugar, 4 tablespoons flour, lemon juice and lemon zest for at least 1 minute. Pour the mixture over the baked crust.
Bake the bars another 20 minutes, or until the lemon topping has set. Sprinkle with confectioner's sugar when serving otherwise it will just soak in and disappear.

Sadly this was the only picture I had turn out to post. I think the camera is tired of food picture!
Rootin' Tootin' Chuck Roast
This one might sound like a hot mess, but don't let the odd ingredient scare you off. What odd ingredient you ask? Root beer! The soda gives a great flavor to the meat and the gravy is out of this world. This is a slow cooker recipe and you will need eight hours on low to cook it, but all the ingredients can be mixed the night before stored in the fridge overnight, in fact I recommend it for the best flavor blending.
Mix all ingredients and pour over roast in slow cooker, cook on low eight hours. When finished remove meat and make gravy.
Gravy
Bring cooking juices to a boil on stove top. Mix 1/8 cup corn or potato starch with 1-2 T. cold water and pour into boiling juices while whisking. remove from heat and pour over roast or use a gravy boat.
The in-laws were over for dinner and they saw how much gravy was leftover and asked to take some home to use on their dinner the next day!
Ingredients
1 14.5 ounce can crushed tomatoes
1 cup root beer
1 packet dry onion soup mix
1 cup chopped onion
3/4 cup chopped celery
1 T. crushed garlic
3 pounds chuck roast
Gravy
Bring cooking juices to a boil on stove top. Mix 1/8 cup corn or potato starch with 1-2 T. cold water and pour into boiling juices while whisking. remove from heat and pour over roast or use a gravy boat.
 |
| My usual portion of meat for dinner, but I went back for more meat after the first taste! |
 |
| Fall apart tender! |
Subscribe to:
Posts (Atom)