 2 tablespoons grapeseed oil 1/2 medium onion, finely chopped 1 rib of celery, finely chopped 1/4 cup finely chopped bell pepper 2 garlic cloves, minced 1 1/2 cups stock 3 15-ounce cans black beans 2 with liquid 1 drained 1/2 teaspoon ground cumin (I LOVE cumin!) 2 teaspoons lemon juice 4 teaspoons cornstarch | 1. Saute onion, celery, pepper and garlic in the oil in a large saucepan over medium heat for 5 minutes. Don't let the veggies brown. 2. Add stock, 1 can of beans and cumin. Bring soup to a boil then reduce heat and simmer for 10 minutes. 3. Puree the soup using an immersion blender or by pouring into a blender in batches. Be very careful not to fill the blender too full and use a hand towel to hold the lid down on the top of the blender so that the hot liquid does not spray out. 4. Add the remaining can of beans with juice and drained can to the soup along with the lemon juice. Combine the cornstarch with 2 tablespoons of water in a small bowl, then add this slurry to the soup and bring it back up to a simmer and cook until thick. The beauty of this soup is you can use any kind of stock you like and make some great combos with this base recipe. Try pork stock with crumbled bacon or stay all veggie with vegetable stock and add some heat by substituting a hot pepper for the bell, experiment and have fun it will be fantastic! |

Thursday, August 18, 2011
Soups On!

Monday, April 18, 2011
My Crochet Journey
As a kid I always loved to watch my mother crochet, she was lightning fast with that hook and I was always baffled how she knew what she was doing. I asked her to show me once, but me being a lefty just made it too hard for her to teach me.
About four years ago I was walking through a craft store and saw the box of Doodle Looms and I was a kid again seeing the commercial for the first time and wanting them so badly. I grabbed the box and some yarn and went home to make my first afghan. I tried so hard to motivate myself to keep making these little doodle things, but it was no where near as fun as the commercial made it out to be! this was all I managed to do...

Flash forward to two years ago and I saw the Knifty Knitters looms and thought I would try my hand at those, I bought every size they made and more yarn thinking If one was large enough I might make an afghan. I managed some nice hats and scarves, but no way was I going to get anywhere on that afghan I wanted with them.
Last year I thought I had my answer with a knitting machine...WRONG! so, here I was last month looking through completed projects and saw a beautiful rainbow throw by Babukatotium and I decided I was going to learn to crochet even if it killed me. I started watching lessons on youtube and not even realizing it I was crocheting right handed and it was working. If your still reading my long winded story there is a happy ending...
I have completed an afghan!


About four years ago I was walking through a craft store and saw the box of Doodle Looms and I was a kid again seeing the commercial for the first time and wanting them so badly. I grabbed the box and some yarn and went home to make my first afghan. I tried so hard to motivate myself to keep making these little doodle things, but it was no where near as fun as the commercial made it out to be! this was all I managed to do...

Flash forward to two years ago and I saw the Knifty Knitters looms and thought I would try my hand at those, I bought every size they made and more yarn thinking If one was large enough I might make an afghan. I managed some nice hats and scarves, but no way was I going to get anywhere on that afghan I wanted with them.
Last year I thought I had my answer with a knitting machine...WRONG!
so, here I was last month looking through completed projects and saw a beautiful rainbow throw by Babukatotium and I decided I was going to learn to crochet even if it killed me. I started watching lessons on youtube and not even realizing it I was crocheting right handed and it was working. If your still reading my long winded story there is a happy ending...I have completed an afghan!


Friday, March 4, 2011
Caramelized Onion Dip
Today's offering is one of my favorite dips...onion dip!
It goes with so many snack options and people will always ask for the recipe.
I don't measure this one so I am going to do my best to give you roughly what I use.
 Dice 2 cups of white onions and saute in 2 T olive oil over med high heat. Sprinkle with a few good pinches of sea salt and 3 pinches of brown sugar. continue to saute until it looks nice and caramelized stirring frequently so not to burn them.
 Let them cool on a towel to absorb some of the oil. Mix 1 1/2 cups of sour cream and mayo together in a good sized mixing bowl and add the cooled onions.
 Next add some garlic salt, vegetable blend, and dried onion My guess is a teaspoon of each.
 Lastly add a teaspoon of Kitchen Bouquet to give it that signature soup mix color.
 Be sure to make it at least 4 hours in advance so the flavors blend well, overnight is best though.
I am serving this tonight with some beer bread I made from a hearty stout.
 Recipe to come!
It goes with so many snack options and people will always ask for the recipe.
I don't measure this one so I am going to do my best to give you roughly what I use.


I am serving this tonight with some beer bread I made from a hearty stout.

Tuesday, February 22, 2011
My New Favorite Turkey Recipe
I know it's February, but I love big turkey dinners with all the trimmings. We always buy 2-3 extras when they go on sale for Thanksgiving so I can have my fix. This time I tried a Cuban inspired seasoning mix and WOW is all I can say. This has orange and lemon and lots of garlic. I strayed from the original recipe as per usual so I will only give mine.
1 cup of orange juice
1 cup of lemon juice
4 tablespoons chopped garlic
1 tablespoon dried oregano
1 tablespoon ground cumin
1 tablespoon black pepper
whisk all the ingredients together and there is your marinade. place turkey in it overnight breast side down in the fridge. I know many of you don't like the turkey bags, but I have to use them for the simple fact that the turkeys they put on sale around Thanksgiving are rather dry otherwise and I don't have the energy to baste it as often as I should, so you decide bag or baste. I use the bag as directed for time and also used the flour in the bag as directed but I didn't cook it breast side up as stated just to keep that breast soaking in the yummy marinade. My last step before sealing the bag was to put the lemon and orange slices in the turkey cavity.
I didn't have my camera ready, but everyone knows what a turkey looks like cooked =)
1 cup of orange juice
1 cup of lemon juice
4 tablespoons chopped garlic
1 tablespoon dried oregano
1 tablespoon ground cumin
1 tablespoon black pepper
whisk all the ingredients together and there is your marinade. place turkey in it overnight breast side down in the fridge. I know many of you don't like the turkey bags, but I have to use them for the simple fact that the turkeys they put on sale around Thanksgiving are rather dry otherwise and I don't have the energy to baste it as often as I should, so you decide bag or baste. I use the bag as directed for time and also used the flour in the bag as directed but I didn't cook it breast side up as stated just to keep that breast soaking in the yummy marinade. My last step before sealing the bag was to put the lemon and orange slices in the turkey cavity.
I didn't have my camera ready, but everyone knows what a turkey looks like cooked =)
Wednesday, February 2, 2011
Butter for Imbolc
Today's is Imbolc, the midway point between winter solstice and spring equinox. It goes by many names, but the sentiment is almost always the same: purity, growth and renewal. The end of the darkness of winter and the approaching renewal of life to the Earth. A great day to get started on the spring cleaning, make a donation box, spark some new love or invigorate an old one.
I decided to make butter this year
1. because it is a bit of a messy project and I will have to give my counters a good cleaning anyway.
2. Dairy is a big part of the Sabbat.
3. Who doesn't love butter!
You will need:
Heavy Cream or Manufacturers Cream
Stand Mixer with Whisk and Paddle attachments and the splatter guard
Ice Water
Make sure to clean off your counter of anything you don't want splattered in buttermilk.
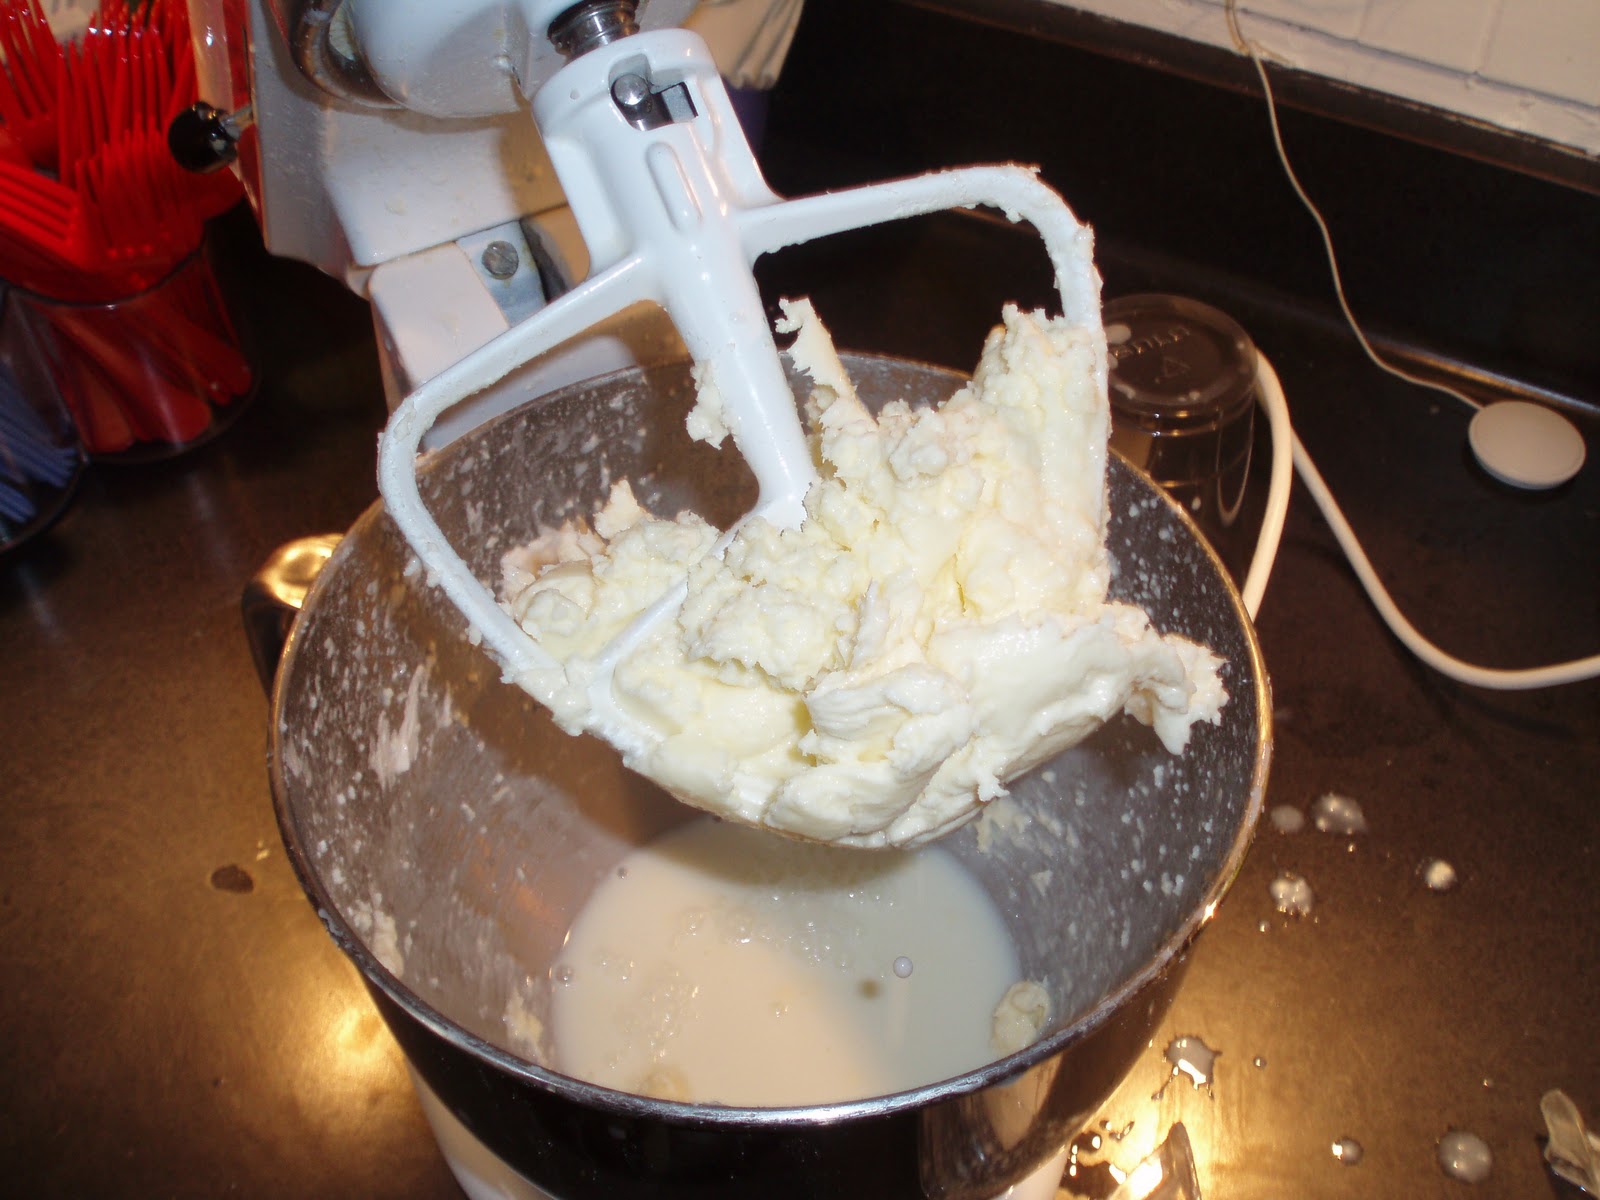
Pour 2 cups heavy cream into mixer with whisk attachment and cover in place and turn mixer to high. you will see it start to make whipped cream then it will start to look chunky. Stop mixer and scrape sides.

turn back on and mix on high again until the buttermilk starts to splatter the guard and the butter sticks to the whisk
 Pour off the buttermilk and save it for biscuits, pancakes, or Texas sheet cake (That's my plan for it)
Switch to the paddle and add some of the ice water. make sure not to add ice though. Mix the butter and ice water to wash the residual buttermilk out. Dump the water and add more.
 After washing the butter 3-4 times you will see the water is much less cloudy and all you have left is yummy butter.
 pack this in an airtight container in the fridge if you have any left from all the taste testing you will be doing.
 I made two batches today. I hope it's enough!
I decided to make butter this year
1. because it is a bit of a messy project and I will have to give my counters a good cleaning anyway.
2. Dairy is a big part of the Sabbat.
3. Who doesn't love butter!
You will need:
Heavy Cream or Manufacturers Cream
Stand Mixer with Whisk and Paddle attachments and the splatter guard
Ice Water
Make sure to clean off your counter of anything you don't want splattered in buttermilk.
Pour 2 cups heavy cream into mixer with whisk attachment and cover in place and turn mixer to high. you will see it start to make whipped cream then it will start to look chunky. Stop mixer and scrape sides.

turn back on and mix on high again until the buttermilk starts to splatter the guard and the butter sticks to the whisk

Switch to the paddle and add some of the ice water. make sure not to add ice though. Mix the butter and ice water to wash the residual buttermilk out. Dump the water and add more.


Friday, January 28, 2011
Shortbread Lemon Bars
As promised yesterday a use for that lemon zest! These are my favorite lemon bars because of the thick shortbread cookie like crust. They have a great zing from the zest and are quite simple to make.
Ingredients
2 1/4 cups all-purpose flour1/2 cup confectioners' sugar
1 cup butter, softened
6 eggs
2 1/4 cups white sugar
3/4 cup lemon juice
zest of one lemon
Powdered sugar for dusting
Mix 2 cups of flour and confectioner's sugar together. Cut in the butter or margarine. Mix well until the dough resembles pie dough consistency. Press the dough into a 9x13 inch baking pan.
Bake 15 minutes.
Beat together eggs, sugar, 4 tablespoons flour, lemon juice and lemon zest for at least 1 minute. Pour the mixture over the baked crust.
Bake the bars another 20 minutes, or until the lemon topping has set. Sprinkle with confectioner's sugar when serving otherwise it will just soak in and disappear.

Sadly this was the only picture I had turn out to post. I think the camera is tired of food picture!
Rootin' Tootin' Chuck Roast
This one might sound like a hot mess, but don't let the odd ingredient scare you off. What odd ingredient you ask? Root beer! The soda gives a great flavor to the meat and the gravy is out of this world. This is a slow cooker recipe and you will need eight hours on low to cook it, but all the ingredients can be mixed the night before stored in the fridge overnight, in fact I recommend it for the best flavor blending.
Mix all ingredients and pour over roast in slow cooker, cook on low eight hours. When finished remove meat and make gravy.
Gravy
Bring cooking juices to a boil on stove top. Mix 1/8 cup corn or potato starch with 1-2 T. cold water and pour into boiling juices while whisking. remove from heat and pour over roast or use a gravy boat.
The in-laws were over for dinner and they saw how much gravy was leftover and asked to take some home to use on their dinner the next day!
Ingredients
1 14.5 ounce can crushed tomatoes
1 cup root beer
1 packet dry onion soup mix
1 cup chopped onion
3/4 cup chopped celery
1 T. crushed garlic
3 pounds chuck roast
Gravy
Bring cooking juices to a boil on stove top. Mix 1/8 cup corn or potato starch with 1-2 T. cold water and pour into boiling juices while whisking. remove from heat and pour over roast or use a gravy boat.
 |
| My usual portion of meat for dinner, but I went back for more meat after the first taste! |
 |
| Fall apart tender! |
Wednesday, January 26, 2011
Pineapple Chicken with Rice

3 cups cooked rice
2 chicken breasts
1 8oz can crushed pineapple with juice
2 1/2 T. lemon juice
Zest of half of the lemon
1/2 cup brown sugar
1 t. mustard powder
1/2 t. curry powder
pepper to taste
Preheat oven to 350. put rice into 8x8 casserole and lay chicken on top. Mix the rest of the ingredients in a bowl and pour over top of chicken. Cover with foil and bake 45-50 minutes uncovering during last 20 min.

Saturday, January 22, 2011
Cheery, Oh! Bars
Many of you know I have a serious love of baking and the harder the recipe the more I want to make it, but sometimes I like a quick and easy recipe that I can toss together and still get raves from the hubby. The hardest part of this recipe is unwrapping all the caramels!


Ingredients
14 ounces of caramels
1/4 cup water
1/2 cup peanut butter4 cups Cheerios cereal
1 cup salted peanuts
1/2 cup peanut butter chips1 cup salted peanuts
Topping
1/4 cup peanut butter
1 cup semisweet chocolate chips
1 cup semisweet chocolate chips
1 stick butter
Directions
In a large microwave-safe bowl, heat caramels, water and 1/2 cup peanut butter on high for 1 minute; stir. Microwave 1 minutes longer or until melted. While microwaving mix cereal, peanut butter chips, and peanuts add to caramel mix and stir until coated. Spread into a buttered 9 x13 pan.
Next microwave chocolate chips, butter and remaining peanut butter on high for 45 seconds and stir until smooth. Spread over cereal mixture. Refrigerate till firm and cut into squares. Don't plan on having them around long!

Sunday, January 16, 2011
Peasant Bread
I have been meaning to share this recipe for some time now because so many people love it. It is the easiest bread to make and has an amazing flavor and texture.

I bake mine in my Grandmas stoneware, but you can make a free form long loaf, round, or bake in a regular loaf pan. Just know the free form spread a lot and will be thinner loaves.

2 cups warm water (110 degrees to 115 degrees), divided
4 cups all-purpose flour
1 teaspoon salt
1 tablespoon sugar

I bake mine in my Grandmas stoneware, but you can make a free form long loaf, round, or bake in a regular loaf pan. Just know the free form spread a lot and will be thinner loaves.

Ingredients
1 (.25 ounce) package active dry yeast2 cups warm water (110 degrees to 115 degrees), divided
4 cups all-purpose flour
1 teaspoon salt
1 tablespoon sugar
Directions
Dissolve yeast in 1 cup warm water with a good pinch of the sugar. In a large bowl, combine flour, salt and remaining sugar. Add the yeast mixture and second cup of water; stir until combined. Cover and let rise in a warm place until doubled, about an hour. Divide dough in half. Place each half in a greased 1-qt. round casserole or ovenproof bowl. If making free form loaves give extra dusting of flour and shape; bake on parchment. Let rise in a warm place until doubled, usually another hour. Bake at 350 degrees F for 45 minutes. When you remove loaves give them a nice coating of butter and remove from pans when cool enough to handle the pan.I know i always say this and everyone doesn't have my free time, but give baking your own bread a try. It is easy and people will treat you like gold (at least until the loaf is gone). =)
Wednesday, January 12, 2011
Box Making
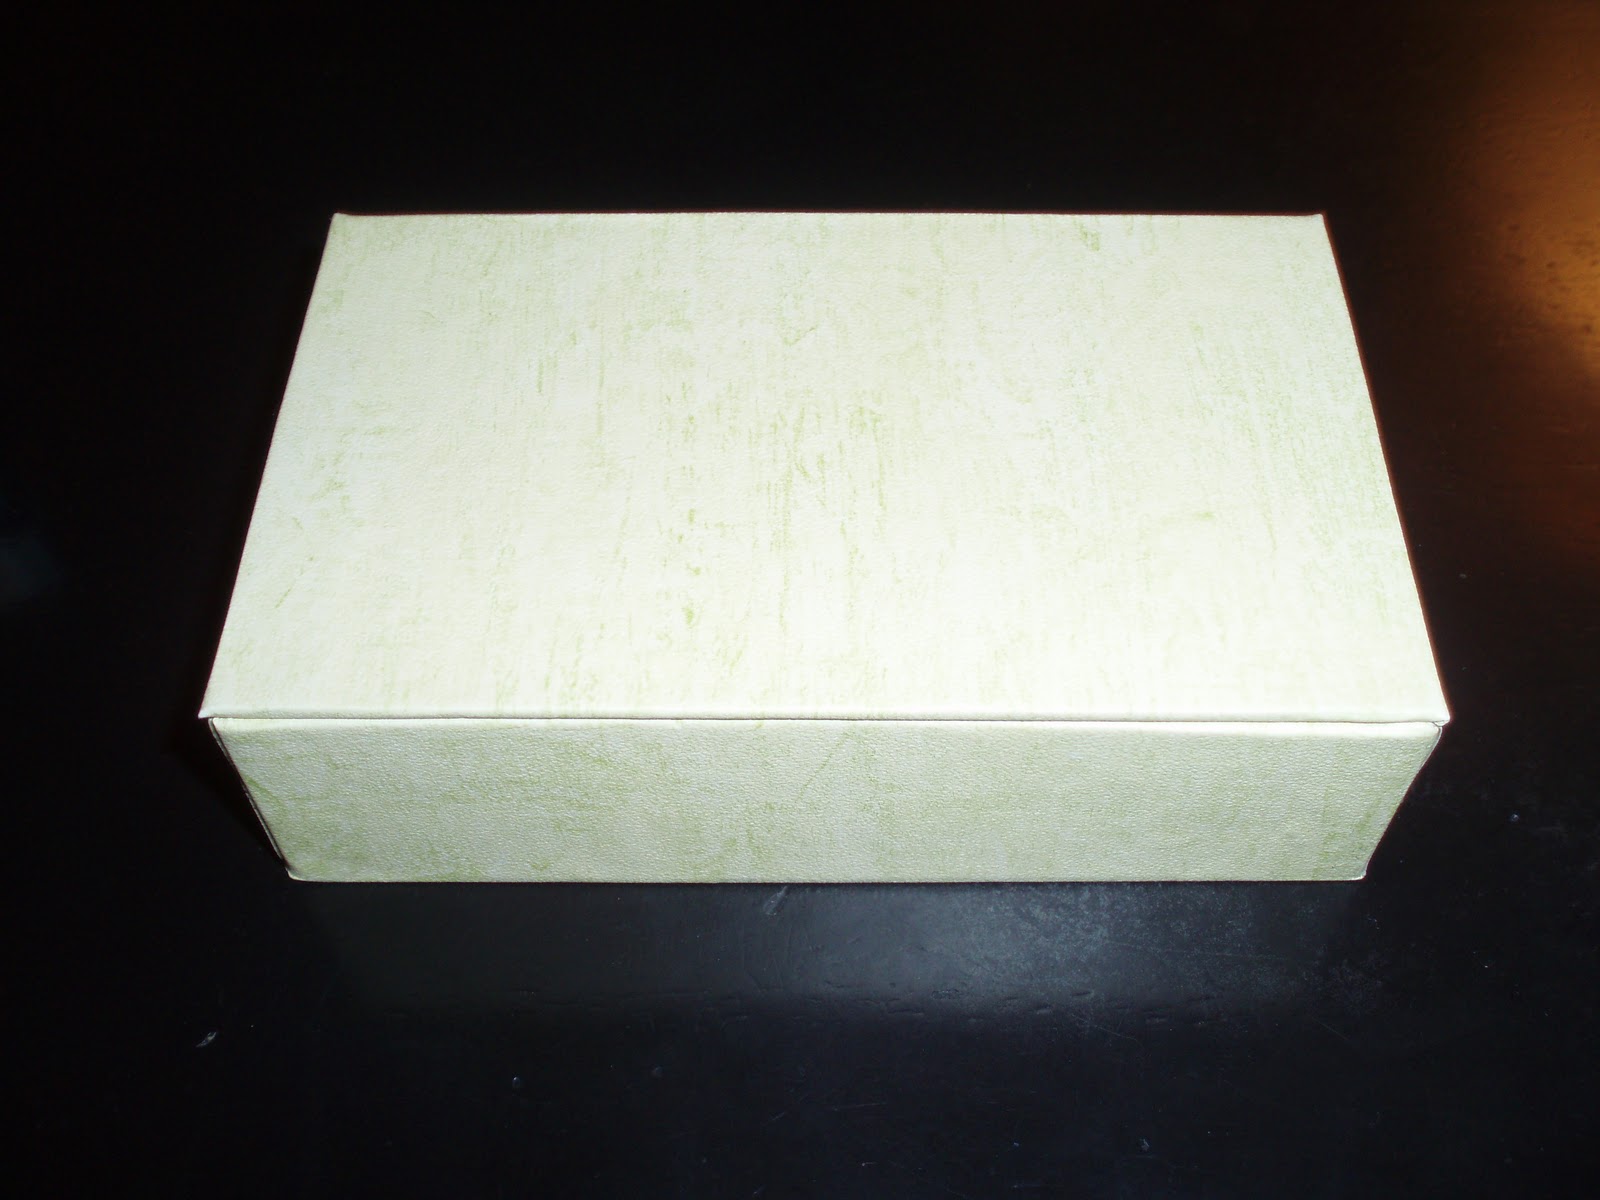
My dear friend Amy came over last week and we played in paper and glue again, but this time we made clam shell boxes.

I have made several since our class and keep improving my skill with each box. This next box was made from a wallpaper sample book we picked up for free at the local paint store. They just throw out the old books so it makes me happy I can give them a new life.

 The last is my favorite one so far because I love this paper so much. You might recognize it from one of the books I made.

 The interior papers are from a wonderful free to download paper toys site I stumbled across and loved.
http://www.thetoymaker.com/2Toys.html
I have made several more smaller boxes, but will be using them in an upcoming craft swap and wouldn't want to spoil the fun if they happen to come to my blog.
 | |
| The Hand marbled paper in the center was from her collection and has inspired me to want to try my hand at making some. |


http://www.thetoymaker.com/2Toys.html
I have made several more smaller boxes, but will be using them in an upcoming craft swap and wouldn't want to spoil the fun if they happen to come to my blog.
Sunday, January 2, 2011
Pineapple Pecan Pie
It is very rare for me not experiment in the kitchen, but This recipe had me second guessing weather I should try it or not, but boy am I glad I did! It's unique combination of flavors blend well and make a delightful and refreshing pie.

The only changes to the original recipe I made were to bake it on the center rack of my oven to prevent it from burning and keep the nuts whole for presentation.
Ingredients
1 (9 inch) unbaked pie crust1 (8 ounce) package cream cheese, softened
1 egg, beaten
1/2 cup white sugar
1/4 teaspoon salt
1 teaspoon vanilla extract
1 (8 ounce) can crushed pineapple, drained very well
1 1/2 cups chopped pecans
3 eggs, beaten
1 cup light corn syrup
1/4 cup white sugar
1 teaspoon vanilla extract
Directions
- Preheat oven to 375 degrees.
- Blend together the cream cheese, 1 egg, 1/2 cup sugar, salt and vanilla. Gently stir in pineapple, pour into pie crust.
- Sprinkle pecans over cream cheese mixture.
- Blend together the 3 eggs, corn syrup, 1/4 cup sugar and vanilla. Pour over pecan layer.
- Place on lower rack of oven and bake for 40 to 50 minutes or until center is firm.
Wednesday, December 22, 2010
Specialty Cake Pans
I have many obsessions when it comes to collecting kitchen equipment, but only one make everyone say "Aww...that's so cute". It's my specialty cake pans. Yesterday I fed my need to own them all thanks to some very generous Birthday gift cards from two very dear friends with the doughnut and the filled cookie. I made the doughnut for last nights Yule gathering and can't wait to make the cookie this week.
 I was in a bit of a rush to decorate it so I made a powdered doughnut with sprinkles but the possibilities are endless. I think next time I will make my favorite a chocolate doughnut with glaze and nuts.

Saturday, December 18, 2010
French Bread
I think everyone should give bread making a try sometime, it can be very simple even without that beast in the back of the cupboard the bread machine. This recipe is easy and makes a delicious loaf of bread perfect for sandwiches or dipping. I was very frazzled and tired when I made it so I didn't get any pictures of this wonderful bread last night but I promise next loaf I will take some.
Ingredients
1 (.25 ounce) package active dry yeast1 cup warm water (110 degrees to 115 degrees)
2 tablespoons sugar
2 tablespoons vegetable oil
1 1/2 teaspoons salt
3 cups all-purpose flour
Cornmeal for dusting
Directions
- In a large bowl, dissolve yeast in warm water. Add the sugar, oil, salt and two cups of the flour. Mix until blended. Stir in enough remaining flour to form a stiff dough.
- On a floured surface; knead until smooth and elastic, about six minutes. Place in a greased bowl and cover; let rise in a warm place until doubled, about an hour. Punch dough down then recover and let rise another half hour.
- Turn dough onto a lightly floured surface. Shape into a loaf 16" long or make three ropes to braid into a loaf. Sprinkle a greased baking sheet with cornmeal; place loaf on baking sheet. Cover and let rise until doubled, about 25 minutes.
- Fill a 9x13 pan half way with hot water and place it on the bottom rack of your oven. Make diagonal slashes about 2" apart across top of regular loaf, but not on the braid. Bake at 375 for a half hour or until golden brown. Place bread on your cooling rack right out of the oven to prevent over browning of the bottom.
Tuesday, December 14, 2010
Mirepoix
I am sure most of you know what one is, but think why bother I will just add some celery and onion to the soup and it will taste just fine. I am here to say your missing out on a whole lot of flavor and a tradition from all over the world for centuries. It couldn't be easier to add this depth of flavor your taste buds will love you for. the ratio is simple two parts onion to one part celery and carrot.
 It is traditionally cooked in butter, but I prefer olive oil. Heat a few tablespoons over medium low in your pan and add the veggies and saute until onion is translucent and your done. Just a little extra step for so much extra flavor.
 Today I am making bean soup so I tossed some crumbled bacon into the pan and then added it to the soup. You can customize your flavors very easily this way, don' t be afraid to experiment!
Happy Cooking!


Happy Cooking!
Saturday, December 11, 2010
Depression Cake
Depression cake is a cake that was made during the depression. The cake has no milk, butter, or eggs because they were to expensive or hard to get. This cake has really come into it own now with so many people developing allergies to dairy and eggs.
You will notice something weird in the ingredient list, but it is vital you use it, and that's vinegar. I promise you will not taste it at all in the cake. The vinegar is used for leavening.


You will notice something weird in the ingredient list, but it is vital you use it, and that's vinegar. I promise you will not taste it at all in the cake. The vinegar is used for leavening.
Ingredients
- 3 cups all-purpose flour
- 2 cups white sugar
- 1 teaspoon salt
- 2 teaspoons baking soda
- 1/2 cup unsweetened cocoa powder
- 3/4 cup vegetable oil
- 2 tablespoons distilled white vinegar
- 2 teaspoons vanilla extract
- 2 cups cold water
Directions
Sift flour, sugar, salt, soda, and cocoa together in a bowl. Make three wells ( I make a happy face to offset the depressing name of the cake).
Pour oil into one well, vinegar into second, and vanilla into the third. Pour cold water over all, and stir well with fork.

Grease and flour a 9x13 pan and pour in the batter. Now you have the option to add some extra richness to the cake by sprinkling 1/4 cup of chocolate chips over the top.

Bake at 350 degrees F for 35 minutes, or until tooth pick inserted comes out clean. I don't frost mine since it is so moist but you can sprinkle it with powder sugar or frost if you like.

The edges roll on this cake (hubby loves the edges this way so I don't fuss about it) so if you want perfect corners just flip the cake onto a platter or cake board. You can also make a layer cake if you wish just use two nine inch rounds and reduce bake time by about 10 minutes.
Thursday, December 9, 2010
Molten Cheese Core Burgers
I love a good cheeseburger, but most of the time if you apply the cheese while the burger is cooking it all goes into the grill/pan and you don't have much gooey cheese to enjoy. Not with this burger! I give you the best cheeseburger I have ever had.
The Juicy Lucy by Cooks Country TV

The Juicy Lucy by Cooks Country TV
Ingredients
Instructions
- 1. Using fork, mash bread, milk, garlic powder, salt, and pepper in large bowl until smooth. Add beef and gently knead until well combined.
- 2. Divide meat mixture into 4 equal portions then divide those in half. Following related photos, mold each portion of meat around 1 piece of cheese and them cover that with the other half of the meat mix and flatten.

Transfer patties to plate and refrigerate for 30 minutes or up to 24 hours. - 3. Grill burgers over medium fire until well browned and cooked through, 6 to 8 minutes per side. Transfer to plate, tent with foil, and let rest 5 minutes. Serve.
- STOVE TOP JUICY LUCY BURGERS
Prepare Grilled Juicy Lucy Burgers through step 2. Heat 2 teaspoons vegetable oil in large nonstick skillet over medium heat until just smoking. Add patties and cook until well browned, about 6 minutes. Flip burgers, cover skillet, and continue cooking until well-done, about 6 minutes. Transfer to plate, tent with foil, and let rest 5 minutes. Serve.

Monday, December 6, 2010
Coptic Stitch Books
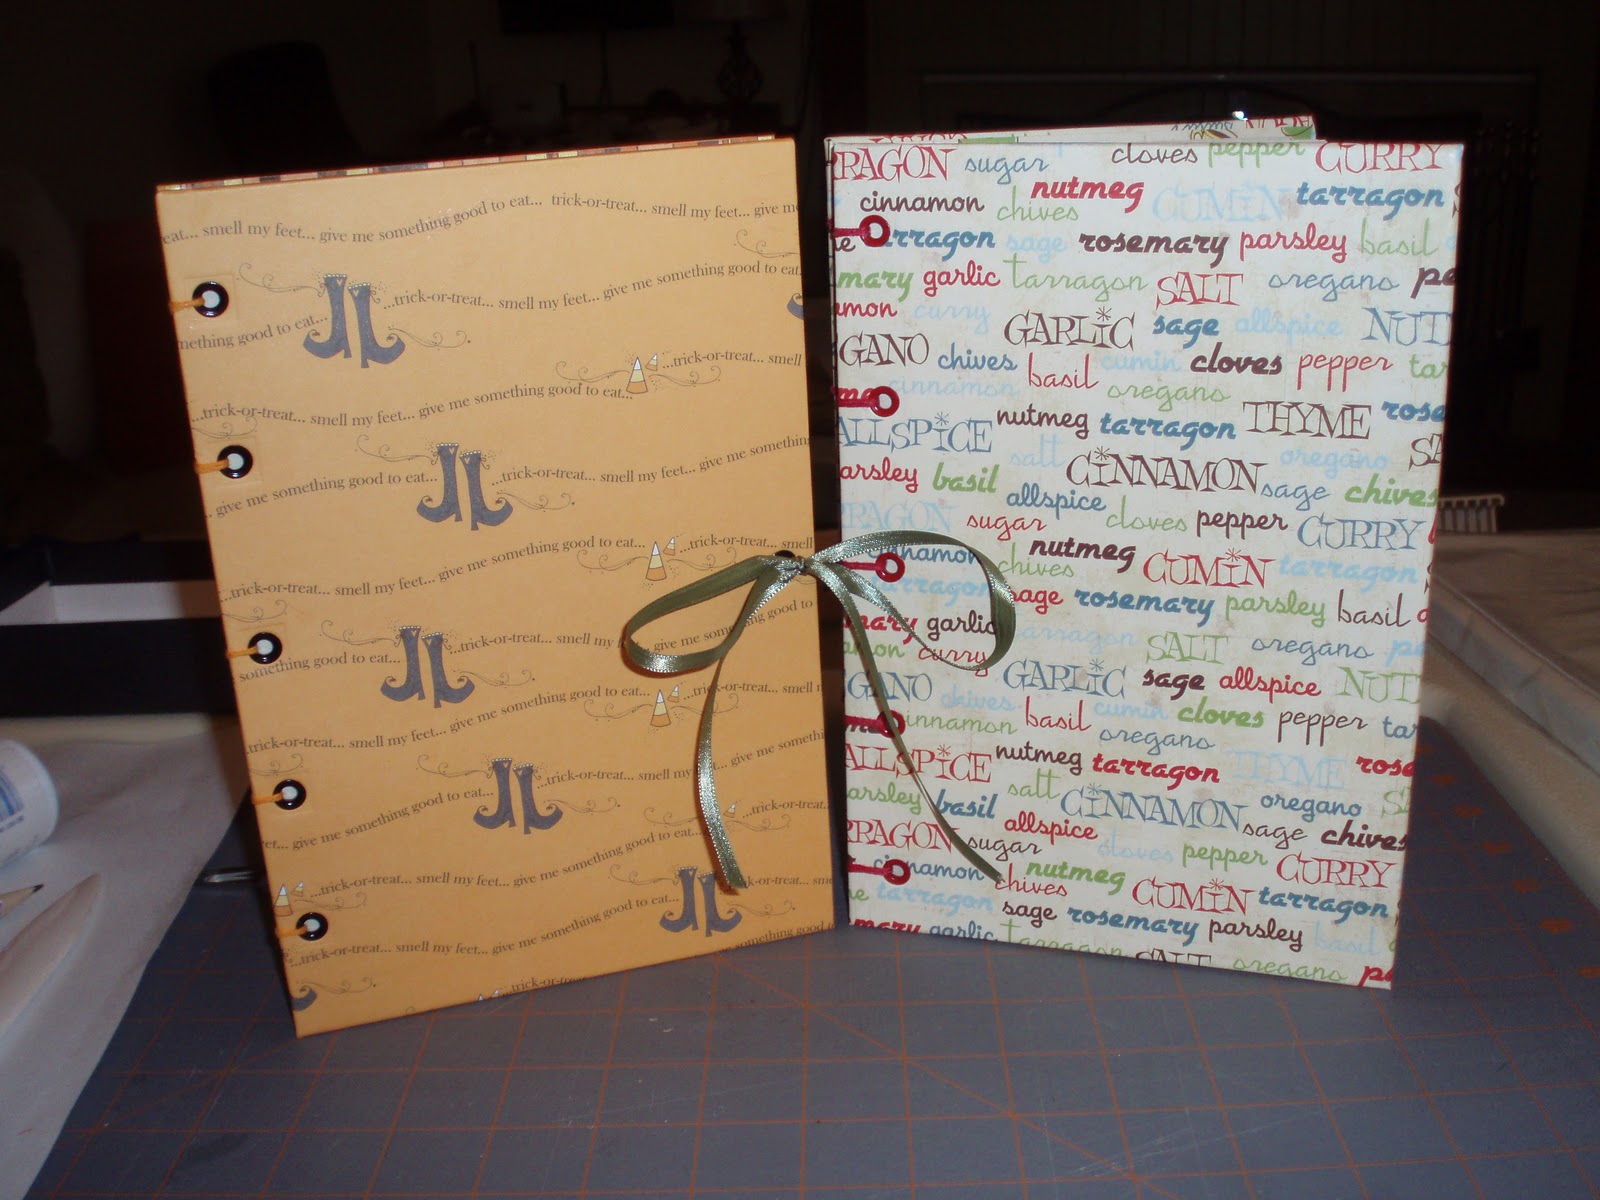
Today is the Birthday of a special friend who like me enjoys cooking, crafting, and Halloween so I made her two coptic stitched cookbooks. One of them is just for her Halloween recipes and the other is for everyday.
 What makes the coptic stitch so nice for cookbooks is the ability to open them flat for writing.

I tried to get a closeup of the stitch itself but the lighting was a bit off. These are the two others I have made so far.


 | ||
| Isn't the inside paper of the everyday cookbook just the cutest! |

Enchilada Sauce
This sauce might not be authentic, but it beats the heck out of the canned stuff in our local grocery.

Ingredients:
3 cups chicken broth
4 Tbs. Chile Powder
1 tsp. ground cumin
2 tsp. garlic powder
3/4 tsp. salt
1 pinch ground cinnamon
a little less than 1/2 tsp. sugar
3 Tablespoons plus 1/4 tsp. white flour
3 Tablespoons vegetable oil
1 small can tomato paste
1 hershy kiss, mini bar or some chocolate chips of the same volume
Directions:
First make a roux. In a 2 quart sauce pan add the oil over medium high heat.
When the oil is hot, lower the heat to low and add the flour.
Mix with a wire whisk for about 1 to 2 minutes stirring constantly.
You want to see a little bubble going on. Then add the chile powder
and whisk in till fully mixed.
Slowly pour in the 3 cups chicken broth.
Turn the heat up to medium again and stir till fully mixed.
Add the tomato paste, cumin, garlic powder, salt, cinnamon and sugar
(the sugar is a little secret to eliminate any bitter taste from the chile powder).
Bring to a boil as you continue to stir.
reduce heat and add the chocolate, stir and cook for 3 to 5 minutes.
Now make your favorite enchilada filling, mine is chicken and cheese.
 1 cup salsa, 1 brick cream cheese, 2 chicken breasts cooked and shredded and about 1 cup pepper jack cheese shredded. combine in saucepan over low heat until cheese is melted.
coat the bottom of the casserole dish with some of your enchilada sauce.
 Roll the tortillas with the filling and lay them in the sauce
 Then cover the entire dish with the rest of the sauce and shredded cheese.
 Bake 350 for abut 30 minutes.
 Garnish with your favorite toppings such as lettuce, tomatoes, or sour cream.


Ingredients:
3 cups chicken broth
4 Tbs. Chile Powder
1 tsp. ground cumin
2 tsp. garlic powder
3/4 tsp. salt
1 pinch ground cinnamon
a little less than 1/2 tsp. sugar
3 Tablespoons plus 1/4 tsp. white flour
3 Tablespoons vegetable oil
1 small can tomato paste
1 hershy kiss, mini bar or some chocolate chips of the same volume
Directions:
First make a roux. In a 2 quart sauce pan add the oil over medium high heat.
When the oil is hot, lower the heat to low and add the flour.
Mix with a wire whisk for about 1 to 2 minutes stirring constantly.
You want to see a little bubble going on. Then add the chile powder
and whisk in till fully mixed.
Slowly pour in the 3 cups chicken broth.
Turn the heat up to medium again and stir till fully mixed.
Add the tomato paste, cumin, garlic powder, salt, cinnamon and sugar
(the sugar is a little secret to eliminate any bitter taste from the chile powder).
Bring to a boil as you continue to stir.
reduce heat and add the chocolate, stir and cook for 3 to 5 minutes.
Now make your favorite enchilada filling, mine is chicken and cheese.

coat the bottom of the casserole dish with some of your enchilada sauce.


Subscribe to:
Posts (Atom)